Your pool vacuum works harder than almost any other piece of pool equipment. It’s traveling across the pool floor, collecting leaves, dirt, algae, and everything else that settles at the bottom. Over time, debris builds up inside the equipment itself, reducing suction, wearing out components faster, and eventually making the vacuum far less effective than it should be.
Most pool owners clean their pools religiously but rarely think to clean the vacuum. The result is a tool that’s meant to make maintenance easier, becoming the thing that needs maintenance. Whether you have a manual vacuum, a robotic cleaner, or a suction-side or pressure-side automatic system, keeping the vacuum itself clean ensures it performs properly and lasts as long as it should.
This guide covers how to clean every type of pool vacuum, which components need regular attention, and what signs indicate your equipment needs more than just a rinse.
Key Takeaways
- Pool vacuums accumulate debris, algae, and calcium deposits that reduce suction and wear out components if left uncleaned.
- Manual vacuums require cleaning of the head, hose interior, and connections after each use, particularly after vacuuming algae or fine sediment.
- Robotic cleaners have internal filters and brushes that need regular cleaning, typically after every 3–5 uses depending on debris load.
- Suction-side and pressure-side automatic vacuums require filter bag cleaning, wheel inspection, and hose checks to maintain performance.
- In Portugal, eucalyptus leaves, pine needles, and calcium-heavy water mean vacuum maintenance is more frequent than in many other climates.
- A clean vacuum performs better, lasts longer, and makes pool maintenance genuinely easier rather than just shifting the workload.
Why Cleaning Your Pool Vacuum Is so Important
A vacuum that isn’t maintained properly becomes a liability rather than an asset. Reduced suction means you’ll need to vacuum the same area multiple times, which wastes time and increases wear on your pump and filter. Debris left inside the vacuum can harbour bacteria and algae spores, reintroducing them into your pool the next time you use it. And components that could have lasted years wear out prematurely when they’re clogged with dirt, calcium, or decomposing organic material.
In a climate with long, hot summers that accelerate algae growth and hard water in many regions causing calcium buildup, vacuum maintenance is particularly important. The vacuum equipment sees a lot of use over an extended season, and the local conditions add specific challenges that need addressing.
How to Clean a Manual Pool Vacuum
Manual vacuums are the simplest type mechanically, but they still require consistent cleaning to work properly. After each use, particularly after vacuuming algae or heavy debris, take these steps.
Step 1: Rinse the Vacuum Head Thoroughly
Once you’ve finished vacuuming and removed the equipment from the pool, rinse the vacuum head under a strong stream of water from a garden hose. Pay particular attention to the underside where debris collects in the suction channels and around the wheels or brushes.
If the vacuum head has brushes, check them for tangled hair, fine algae strands, or compacted dirt. Use an old toothbrush or a stiff brush to scrub them clean. Brushes that are left matted with debris don’t scrub effectively and can scratch pool surfaces.
Step 2: Flush the Vacuum Hose
The vacuum hose is where most unseen buildup occurs. Algae, biofilm, and fine sediment coat the interior walls over time, reducing water flow and creating a reservoir for bacteria.
To clean the hose properly, stretch it out straight on your lawn or driveway. Insert a garden hose into one end and run water through at full pressure for several minutes. Watch the water coming out the other end and if it’s cloudy or discoloured, keep flushing until it runs clear.
For a deeper clean, particularly after vacuuming algae, add a small amount of diluted bleach or pool shock to a bucket of water, pour it into one end of the hose, and let it sit for 15 to 20 minutes before flushing thoroughly with clean water. This kills any algae or bacteria clinging to the interior walls.
Step 3: Inspect and Clean the Hose Cuffs
The cuffs (the connectors at each end of the hose) often accumulate calcium deposits and debris around the threads and seals. Wipe them down, and if calcium buildup is visible, soak them briefly in white vinegar or a diluted citric acid solution to dissolve the scale. Rinse thoroughly before reassembling.
Check the rubber gaskets inside the cuffs. If they’re cracked, worn, or have lost their flexibility, replace them. Because a poor seal at the cuff connection is one of the most common causes of lost suction.
Step 4: Dry and Store Properly
Before storing, drain all water from the hose and let it dry completely in the sun. Storing a wet hose encourages mould and mildew growth inside. Coil it loosely rather than tightly as tight coiling can weaken the hose walls over time and lead to cracks. Store the vacuum head, pole, and hose in a shaded, dry location away from direct sunlight when not in use, as UV exposure degrades plastic and rubber components.
How to Clean a Robotic Pool Vacuum
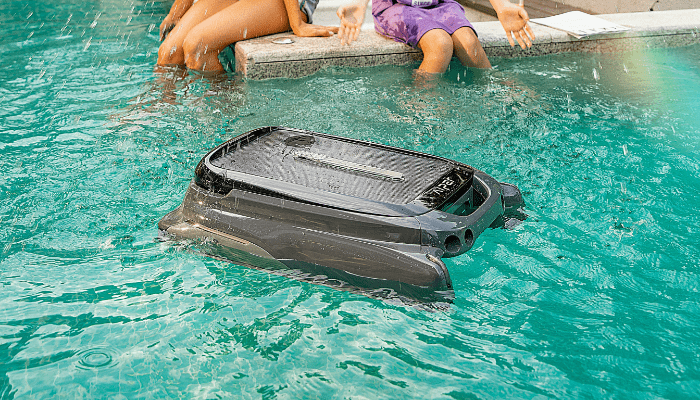
Robotic vacuums are more complex than manual systems and have internal components that need regular attention. Neglecting this maintenance is one of the fastest ways to shorten the lifespan of an expensive piece of equipment.
Step 1: Empty and Clean the Filter Basket or Cartridge
After each cleaning cycle, remove the filter basket or cartridge from the robotic cleaner. Empty out the debris like leaves, dirt, hair, or insects, and rinse the basket thoroughly under a hose. Use a soft brush to remove any fine particles stuck in the mesh.
For cartridge filters, rinse until water runs clear. If the cartridge looks discoloured or clogged despite rinsing, soak it in a filter cleaning solution or diluted bleach for 15 to 20 minutes, then rinse thoroughly before reinstalling.
How often you need to deep-clean the filter depends on how dirty your pool is. If you’re vacuuming after a storm, heavy leaf fall, or an algae outbreak, clean the filter after every use. For routine maintenance, a thorough clean every 3–5 cycles is usually sufficient.
Step 2: Check and Clean the Brushes and Rollers
Robotic vacuums have rotating brushes or rollers on the underside that scrub the pool floor and walls. Hair, algae strands, and fine debris wrap around these components and reduce their effectiveness.
Remove the brushes or rollers according to your model’s instructions (usually a simple clip or screw release). Pull off any tangled hair or debris by hand, and scrub the bristles with a stiff brush. Check for wear. If the bristles are significantly flattened or missing, the brushes need replacing.
Step 3: Inspect the Tracks or Wheels
The wheels or tracks that move the cleaner around the pool accumulate grit, sand, and calcium deposits. Wipe them down with a damp cloth, and check that they rotate freely. If they’re stiff or grinding, calcium buildup or debris may be lodged in the axles. A brief soak in white vinegar usually solves this.
Step 4: Rinse the Exterior and Check the Intake Ports
Rinse the exterior housing of the robotic vacuum with clean water, paying attention to the intake ports where water and debris enter. These can become partially blocked by leaves or algae. A blocked intake port reduces suction significantly.
Step 5: Store Correctly
After cleaning, let the robotic vacuum dry completely before storing it. Store it out of direct sunlight, preferably indoors or in a shaded pool equipment area. Leaving it in the sun degrades the rubber seals and plastic housing over time. Store the power cable loosely coiled to avoid kinks or damage to the internal wiring.
How to Clean Suction-Side and Pressure-Side Automatic Vacuums
These automatic systems operate continuously while your pool pump runs, which means they accumulate debris faster than equipment that’s only used occasionally.
Step 1: Empty and Clean the Filter Bag (Pressure-Side Vacuums)
Pressure-side vacuums collect debris in an attached filter bag. After each cleaning session, or when the bag looks visibly full, remove it and empty the contents. Rinse the bag thoroughly under a hose, turning it inside out to flush out fine particles.
Over time, the mesh will become clogged with algae and fine sediment even after rinsing. Soak the bag in a bucket of water with a small amount of pool shock or diluted bleach for 15–20 minutes, rinse thoroughly, and allow it to dry completely before reattaching.
Replace the filter bag annually, or sooner if the mesh shows visible wear or tearing.
Step 2: Inspect and Clean the Hoses
Automatic vacuum hoses can develop the same algae and biofilm buildup as manual vacuum hoses. Disconnect the hoses from the cleaner and the wall fitting, stretch them out, and flush them thoroughly with a garden hose. If water flow seems restricted, there may be a blockage. Try running water from both ends to locate and clear it.
Check the hose sections for cracks, particularly at the connection points. Cracked hoses allow air into the system, which reduces suction and causes the vacuum to function poorly.
Step 3: Clean the Wheels, Gears, and Moving Parts
Automatic vacuums have wheels, gears, and sometimes turbine components that drive movement. Sand, grit, and calcium deposits can accumulate in these parts and cause them to seize or wear out prematurely.
Remove the bottom plate of the vacuum (most models make this straightforward) and inspect the interior. Remove any visible debris, and wipe down the gears and wheels with a damp cloth. If calcium deposits are present, a diluted vinegar soak followed by thorough rinsing usually clears them.
Lubricate any moving parts according to your manufacturer’s instructions. Some models specify a silicone-based lubricant for gears and bearings.
Step 4: Check the Diaphragms, Flaps, and Seals (Suction-Side Vacuums)
Suction-side vacuums often use rubber diaphragms or flaps to regulate water flow and movement. These components wear out over time and are often the first thing to fail. Remove and inspect them. If they’re cracked, stiff, or have lost their flexibility, replace them. Replacement parts are inexpensive and widely available.
Signs Your Pool Vacuum Needs More Than Basic Cleaning
Sometimes routine cleaning isn’t enough, and the vacuum needs repair or component replacement. Watch for these signs below.
Reduced suction despite clean filters and baskets. This often indicates a blockage deep in the hose, a failing pump, or worn seals that are allowing air into the system.
The vacuum moves erratically or gets stuck frequently. Worn wheels, damaged tracks, or failing internal gears are usually the cause. Inspect and replace as needed.
Visible cracks or brittleness in hoses, seals, or housing. UV exposure and age degrade plastic and rubber. Replace components before they fail completely during use.
The vacuum head doesn’t maintain contact with the pool floor. Worn brushes, damaged wheels, or a warped vacuum head can all cause this. Check for uneven wear or damage.
Unusual noises or vibrations (robotic vacuums). This can indicate internal motor issues, tangled debris around moving parts, or failing bearings. Turn the unit off and inspect immediately.
Prevention: Reducing How Often You Need to Deep-Clean
A few habits reduce how often your vacuum needs intensive cleaning:
Brush the pool before vacuuming. Loosening debris from walls and steps before vacuuming means less material gets compacted into the vacuum’s internal components.
Skim the surface regularly. The less debris that reaches the pool floor, the less your vacuum has to work, and the less buildup occurs inside the equipment.
Rinse the vacuum after every use. A quick rinse immediately after vacuuming prevents debris from drying and hardening inside the equipment, which makes deep cleaning far easier.
Balance pool chemistry consistently. Unbalanced water accelerates calcium buildup on vacuum components and degrades rubber seals faster. Keep pH, alkalinity, and calcium hardness in the recommended ranges.
Natural Pools
If the recurring maintenance of conventional pool equipment, including vacuum cleaning, has started to feel like too much ongoing work, it’s worth asking whether the design of your pool is fundamentally working with you or against you.
Natural pools eliminate the need for vacuum equipment entirely in many cases. The biological filtration system continuously processes organic matter through our specially-designed pumps and filters, aquatic plants and beneficial microorganisms, which means debris is broken down naturally rather than mechanically collected. Surface skimming is still useful, but the intensive floor vacuuming required in conventional pools is either reduced significantly or unnecessary altogether.
Especially in countries, where the climate supports year-round plant growth and the warm temperatures that make conventional pool maintenance demanding are precisely what make natural pool ecosystems thrive, this approach is worth considering for anyone building a new pool or reconsidering their current setup.
Conclusion
Cleaning your pool vacuum isn’t glamorous work, but it’s straightforward and makes a real difference to how well the equipment performs and how long it lasts. Rinse after every use, deep-clean regularly, inspect moving parts and seals, and replace components when they show wear. Do those things, and your vacuum will keep doing its job reliably for years.
If you’d like to explore a pool design that reduces the overall maintenance burden rather than adding to it, Oásis Biosistema works with homeowners across Portugal to create natural pools and luxury outdoor spaces that are genuinely easier to live with. Get in touch to discuss what might work for your space.
FAQ
How to clean a robotic pool vacuum?
To clean a robotic pool vacuum, remove the filter basket and rinse it thoroughly with a hose. Check brushes and wheels for debris, and wipe sensors if present. Allow components to dry before reassembling. Regular cleaning improves performance and extends the vacuum’s lifespan.
How to clean a pool with a pool vacuum?
To clean a pool with a vacuum, attach it to the skimmer or pump line and move slowly across the pool floor. Overlapping strokes prevent missed areas. Vacuum debris to the filter or waste setting, depending on dirt level, and run the filter afterward for clarity.
What is the lifespan of a pool vacuum?
The lifespan of a pool vacuum depends on type and maintenance. Robotic vacuums often last 5–8 years, while manual or suction vacuums may last longer with proper care. Regular cleaning, correct storage, and timely part replacement help maximise durability.
How to clean a pool vacuum filter?
To clean a pool vacuum filter, remove the filter cartridge or bag and rinse it with a hose until debris is gone. For deep cleaning, soak the filter in a mild cleaning solution, then rinse thoroughly. Let it dry before reinstalling for optimal filtration.