Un-winterizing your pool (also called spring opening or de-winterizing) is the process of reversing everything you did to close it for winter: removing the cover, reinstalling drain plugs, restarting equipment, and balancing water chemistry so the pool is clean, clear, and safe to swim in.
Done properly, un-winterizing takes a weekend and results in swim-ready water. Done hastily or out of sequence, you’ll spend weeks fighting green water, equipment problems, and chemistry imbalances that could have been avoided with a bit of upfront care.
This guide walks through the 10 essential steps to un-winterize your pool correctly, in the right order, with Portugal-specific timing and considerations built in.
Key Takeaways
- Timing matters: Un-winterize before water temperatures consistently reach 20°C (68°F) to prevent algae growth, typically late March to mid-April in Portugal.
- The process has a specific sequence: remove cover → reinstall plugs → refill → prime pump → balance chemistry → shock → run filter continuously for 24 to 48 hours.
- Don’t skip priming the pump as running it dry damages the motor and impeller.
- Balance water chemistry in the correct order: pH and alkalinity first, then calcium hardness, then shock.
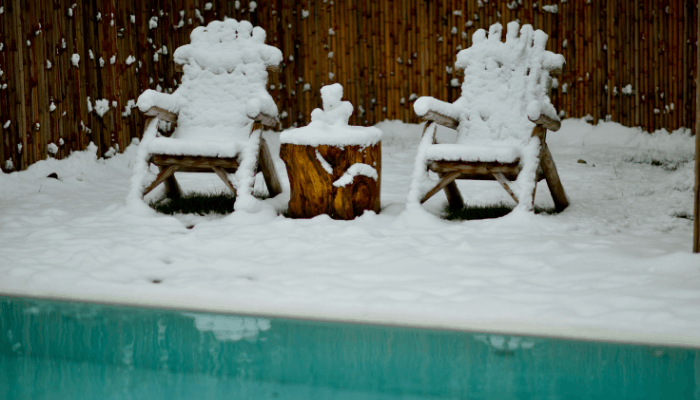
- In Portugal’s mild climate, most pools don’t fully winterize (no antifreeze, no complete draining), but spring opening is still essential after months of minimal maintenance.
- Natural pools require far less intervention at opening with no chemical balancing, no shock treatment, just ecosystem checks and debris removal.
Imagine Your Pool with Perfect Water Every Time
When to Un-Winterize Your Pool
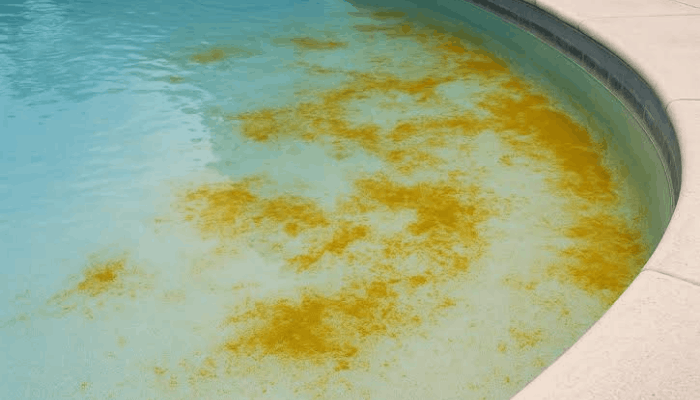
The rule is simple: open your pool before water temperatures stay above 20°C during the day. At this threshold, algae growth accelerates dramatically. In stagnant, covered water, algae can turn a pool green within days once temperatures reach this point.
Portugal timing:
- Southern regions (Algarve, Alentejo): Late March to early April
- Lisbon and coastal areas: Mid to late April
- Northern Portugal (Porto, Braga): Late April to early May
If you wait until you’re ready to swim in mid-May or June, you’re opening a pool that’s already growing algae. Green, cloudy water is far harder to fix than preventing it in the first place.
10 Steps to Un-Winterize Your Pool
Step 1: Remove and Clean the Winter Cover
If you have standing water on the cover, pump it off using a submersible cover pump before removing the cover. Never try to remove a cover with significant water weight. It’s too heavy and you risk spilling dirty water into the pool.
Clear debris from the cover surface using a leaf net or soft brush. Work slowly from one end to the other, folding the cover as you go to prevent debris from falling into the pool.
Once removed, lay the cover flat on your lawn or driveway, rinse thoroughly with a garden hose, scrub any stubborn dirt or algae with a soft brush and mild detergent, then let it dry completely in the sun. When fully dry, sprinkle lightly with talcum powder or baking soda (to absorb residual moisture and prevent mold), fold loosely, and store in a cool, dry place.
Spring pollen (April–May) coats the pool covers heavily. A thorough cleaning before storage prevents pollen buildup from degrading the cover material over summer.
Step 2: Remove Debris from the Pool
Use a leaf rake or skimmer net to remove floating and settled debris like leaves, twigs, insects, and any organic matter that found its way over winter. Empty the skimmer and pump baskets.
Don’t worry about getting every last bit as you’ll be vacuuming properly once the system is running. This is just an initial rough clear.
Step 3: Reinstall Drain Plugs and Winterizing Components
Walk around the pool equipment area and locate all the drain plugs you removed during winterization. These were typically removed from:
- Pump housing (usually at the bottom)
- Filter housing (drain valve or plug at base)
- Heater (if you have one)
- Chlorinator or salt cell housing
Reinstall all drain plugs securely. Use Teflon tape on threaded plugs to ensure a good seal, but don’t overtighten, because you risk cracking plastic housings.
Remove winterizing plugs from the pool’s return lines (the fittings where water flows back into the pool from the filter). If you used gizzmos or ice compensators in the skimmer, remove those and replace the skimmer basket.
Portugal note: Most Portuguese pools don’t use antifreeze or fully drain lines because winters are mild. If you did use antifreeze, you’ll need to flush it out through the waste line once the pump is running (see Step 6).
Step 4: Inspect All Equipment
Before turning anything on, do a visual inspection:
Check the pump for cracks in the housing or lid. Inspect the pump lid O-ring for cracking or brittleness and replace if needed. A worn O-ring won’t seal properly and causes air leaks that prevent the pump from priming.
Check the filter. If it’s a cartridge filter, ensure the cartridge is installed and the clamp band is tight. For sand or DE filters, make sure the multiport valve moves freely.
Check visible plumbing for cracks, particularly around joints and elbows. Winter temperature fluctuations can cause brittle plastic to crack.
Inspect pool surfaces for damage. Look for cracks in tiles, staining, or any visible deterioration that developed over winter.
Address any issues now before starting equipment. A small crack found early is far cheaper to fix than a burst pipe discovered mid-season.
Step 5: Refill the Pool to Correct Level
If the water level dropped over winter (evaporation or intentional lowering), use a garden hose to refill. The correct level is halfway up the skimmer opening which is high enough for the skimmer to draw water, but not so high that debris bypasses it.
Filling can take several hours depending on pool size. While the pool fills, move on to the next step.
Step 6: Prime the Pump and Start the System
Priming is critical. Never start a pool pump dry. It will overheat and damage the motor and impeller within minutes.
How to prime:
- Make sure all drain plugs are reinstalled and all winterizing plugs are removed.
- Open the pump lid, inspect the pump basket, and remove any debris.
- Inspect the pump lid O-ring. If it’s dry or cracked, replace it. If it’s in good condition, apply a thin coat of silicone-based lubricant (never petroleum-based) to help it seal.
- Fill the pump housing completely with water using a garden hose or bucket.
- Replace the pump lid and tighten securely (hand-tight, don’t force it).
- Open the air relief valve on top of your filter (small knob beneath the pressure gauge).
- Turn on the pump.
- Watch the pump. Water should begin flowing through the system within 30 seconds. Once water sprays from the air relief valve, close it. The system is now primed and pressurised.
- Check the pressure gauge on the filter. It should read within the normal range (typically 10–20 psi for most residential systems).
If the pump won’t prime: Turn it off after 1 minute. Refill the pump housing with water and try again. If it still won’t prime after 3 attempts, check for air leaks at the pump lid, drain plugs, or pipe connections. Make sure the skimmer basket is in place and the water level is high enough.
Run the pump continuously for the next 24 to 48 hours. Don’t shut it off until the water is balanced, shocked, and clear.
Step 7: Brush and Vacuum the Pool
With the pump running, give the entire pool a thorough brushing. Start at the waterline (where oils, pollen, and calcium scale accumulate most) and work down the walls to the floor. Brush steps, ladders, corners, and any other surfaces where algae or biofilm might be clinging.
This dislodges debris and algae spores, putting them into suspension where your shock treatment (Step 9) can reach them.
Once brushed, vacuum the pool floor to remove sediment, dirt, and organic material that settled over winter. For very dirty pools, vacuum to waste (if your system allows it) rather than through the filter to avoid clogging it immediately.
Step 8: Test and Balance Water Chemistry
Use a reliable test kit or test strips to check your water. Balance chemistry in this order:
- pH: Target 7.2–7.4
If pH is too low (acidic), add soda ash (sodium carbonate). If too high (alkaline), add muriatic acid or dry acid (sodium bisulfate).
- Total Alkalinity: Target 80–120 ppm
Alkalinity buffers pH. Adjust it before or alongside pH. To raise alkalinity, add sodium bicarbonate (baking soda). To lower it, add muriatic acid in small increments.
- Calcium Hardness: Target 200–400 ppm
In many parts of Portugal, tap water is moderately hard, so calcium levels are often acceptable without adjustment. Test it and if necessary, add calcium chloride to raise hardness. Lowering calcium requires partial draining and refilling with softer water (rarely needed).
- Cyanuric Acid (Stabiliser): Target 30–50 ppm
Cyanuric acid protects chlorine from UV degradation. If you use stabilised chlorine (tablets or granules), this level builds naturally. If you use liquid chlorine or saltwater generation, add stabiliser manually through the skimmer with the pump running.
Portugal note: Hard water in many regions (particularly Lisbon, Setúbal, and inland areas) means calcium buildup is common. Monitor calcium hardness to prevent scale formation on pool surfaces and equipment.
Step 9: Shock the Pool
Once pH and alkalinity are balanced, shock the pool. Shocking adds a concentrated dose of chlorine (or non-chlorine oxidiser) that kills bacteria, algae spores, and organic contaminants that have built up over winter.
How much to use:
- Clean, clear water: 1 kg granular chlorine shock per 40,000 litres (10,000 gallons)
- Cloudy or slightly green water: 2–3 kg per 40,000 litres
- Heavily contaminated or green water: 5 kg per 40,000 litres
How to add it:
Dissolve the shock in a bucket of water first (especially for vinyl-lined pools), then pour it slowly around the perimeter of the pool with the pump running. Never dump shock directly onto the pool floor. It can bleach liners and damage surfaces.
Shock in the evening or late afternoon. Sunlight degrades chlorine quickly, so adding it when UV exposure is low ensures it has time to work overnight.
Step 10: Run the Filter Continuously for 24 to 48 Hours
After shocking, keep the pump and filter running non-stop for at least 24 hours, ideally 48. This circulates the shock treatment throughout the pool and filters out dead organic matter and suspended particles.
Check the filter pressure gauge regularly. If it rises significantly above the normal baseline, backwash (sand or DE filters) or clean (cartridge filters) as needed.
Empty skimmer and pump baskets regularly during this period. They’ll fill quickly as debris is pulled from the water.
After 24 to 48 hours, retest water chemistry. Chlorine should have dropped back to 1–3 ppm. If it hasn’t, continue running the filter and retest in another 12 hours. Once chlorine is in the safe range and water is clear, the pool is ready to use.
Optional: Add Algaecide and Clarifier
Once chlorine levels drop below 3 ppm (usually 24 hours after shocking), you can add:
Algaecide: A preventative dose helps suppress algae growth during the critical first few weeks of spring when pollen and warm temperatures create ideal conditions. Use a non-foaming algaecide to avoid surface foam.
Clarifier: Helps the filter capture fine particles such as pollen, dust, and microscopic debris, that would otherwise make water look hazy. Particularly useful in Portugal during spring pollen season (April–May).
Follow product instructions for dosing. Both products work slowly so allow 24 hours of circulation before evaluating results.
Portugal-Specific Considerations
Mild winters mean minimal winterization. Most Portuguese pools don’t use antifreeze, don’t drain lines completely, and don’t need extensive freeze protection. However, spring opening is still essential after months of reduced maintenance.
Spring pollen is heavy. April and May bring significant pollen loads across Portugal. Plan for increased skimming and consider a clarifier to help your filter capture fine particles.
Summer water restrictions. Many municipalities restrict pool filling and watering during summer drought periods. Opening your pool in early spring, before restrictions take effect, which ensures you can refill to proper levels without regulatory issues.
Regional climate variation. Coastal areas (Algarve, Costa Vicentina) are warmer earlier and need opening sooner. Northern and inland regions (Trás-os-Montes, Beiras) can wait slightly longer. Adjust timing based on your local microclimate, not just general “Portugal” guidelines.
Natural Pools: A Simpler Opening Process
Everything above applies to conventional chlorinated pools. Natural pools are built around biological filtration using aquatic plants and microbial ecosystems and have a fundamentally simpler spring opening.
Natural pool opening process:
- Remove debris from swimming and regeneration zones.
- Check water flow between zones, ensure pumps are working and pipes are clear.
- Inspect plant health, trim any dead vegetation, check for new growth.
- Restart circulation pump.
- Monitor water clarity over the next few days as the biological system reactivates.
That’s it. No chemical balancing, no shock treatment, no pH adjustments, no weekly testing. The ecosystem does the ongoing work. Spring opening for a natural pool is simpler, faster, and requires far less intervention than conventional pool opening.
If the chemical routine of conventional pool ownership has started to feel like recurring work rather than enjoyable maintenance, a natural pool is worth exploring. Oásis Biosistema designs and builds natural pools across Portugal that are suited to the local climate and genuinely easier to live with. Get in touch to learn more.
Conclusion
Un-winterizing a pool is straightforward but requires care and patience. Remove the cover properly, reinstall all plugs, refill to the correct level, prime the pump before starting it, balance water chemistry in the correct order, shock the pool, and run the filter continuously until water is clear.
Follow the steps in sequence, don’t rush the chemistry, and your pool will be swim-ready within a few days. Skip steps, start equipment dry, or add chemicals out of order, and you’ll spend weeks fixing problems that could have been avoided.
Take your time, follow the process, and you’ll be swimming in clear water by the time Portugal’s warm weather arrives.
FAQ
How to restart the pool after being winterized?
To restart a pool, remove and clean the cover, refill water to the proper level, reconnect equipment, and start the pump. Clean or backwash the filter, test and balance chemicals, then shock the pool. Run the system continuously until the water clears.
What happens if a pool is not winterized?
If a pool isn’t winterized, freezing temperatures can damage pipes, pumps, and filters. Debris and algae may build up, leading to dirty water and costly repairs. Water expansion from freezing can crack equipment and plumbing, making spring opening more difficult and expensive.
How do you de-winterize a pool?
De-winterizing involves removing the cover, reconnecting equipment, refilling water, and restarting the filtration system. Clean debris, test water chemistry, and shock the pool to kill bacteria and algae. Continue filtering and adjusting chemicals until the pool becomes clear and balanced.
How to remove winter cover from inground pool?
Remove debris and water from the cover first using a pump or brush. Carefully detach anchors or weights, then lift and fold the cover without letting dirt fall into the pool. Clean and dry it before storing to prevent mold and damage.